Acrylic Paint Pouring Flowers – Try this

Acrylic Paint Pouring is Fun & Freeing

Acrylic paint pouring has gained immense popularity among artists and non-artists alike.  Artists like it because it is another outlet for their creativity.  There’s a great amount of mystery to using these paints and attempting to follow the many techniques out there.  You just Can’t predict what the exact outcomes will be and  that is part of the fun of it, as I see it.  It’s also  this unpredictability,   that attracts artists who want to “loosen up” in their own painting.

Non-Artists also have fun with Acrylic Pouring

Non-artists find this medium to be exciting with sometimes beautiful rewards.  I will say, it’s not for the person who has to have everything laid for them and for whom a perfect outcome is what they’re seeking.  But that’s not most artists.  In my last class, there were several students who are basically beginners and I wasn’t sure how they would take to the pouring.  They had fun with it and really created some interesting and beautiful “flowers”.

The supplies needed

There are many  pre-mixed pouring paints.  The only one of these that I have used is Color Pour by American Crafts that I picked up at Joanne Fabrics.  These seemed a bit thicker than those that I had mixed myself.  Of course, water can always be added to get to a thinner viscosity.  

If you want to mix your own pouring paints, you can use the ratio of 1 part paint to 1 part Floetrol (by Flood at Lowe’s)with a bit of water added.  This is an experimental type of medium so a bit of playing is to be expected.  You probably should keep some sort of log of what & how you mixed various paints.  I’m kind of a “fly by the seat of my pants” girl and I go more by sight and feel.  It’s all fun but quite messy!

Some Helpful Hints

  1.     Have a clean, level,  covered workspace
  2.     Place Push-pins into the 4 corners of canvas for feet or rest canvas on 4 same size upside-down plastic glasses
  3.     I mixed my paints and put them into plastic condiment containers from the Dollar Store (2/$1).   Mine have lasted a long time, over a year
  4.      These take a long time (up to a week) to dry thoroughly so be prepared to have space to lay them out
  5.     Use “Puppy pads” from dollar store to absorb some of the dripping paint. 
  6.     There are many recipes for mixing paints and many additives that can be put in.  My ratio above is all that I have used but I have added a drop of Silicone (to get larger cells) to some of the mixes.  I like the spontaneous aspect to this whole medium.

The how-to's of some simple Acrylic Paint Pouring

“Blow-Out”

Orange Poured Paint flower

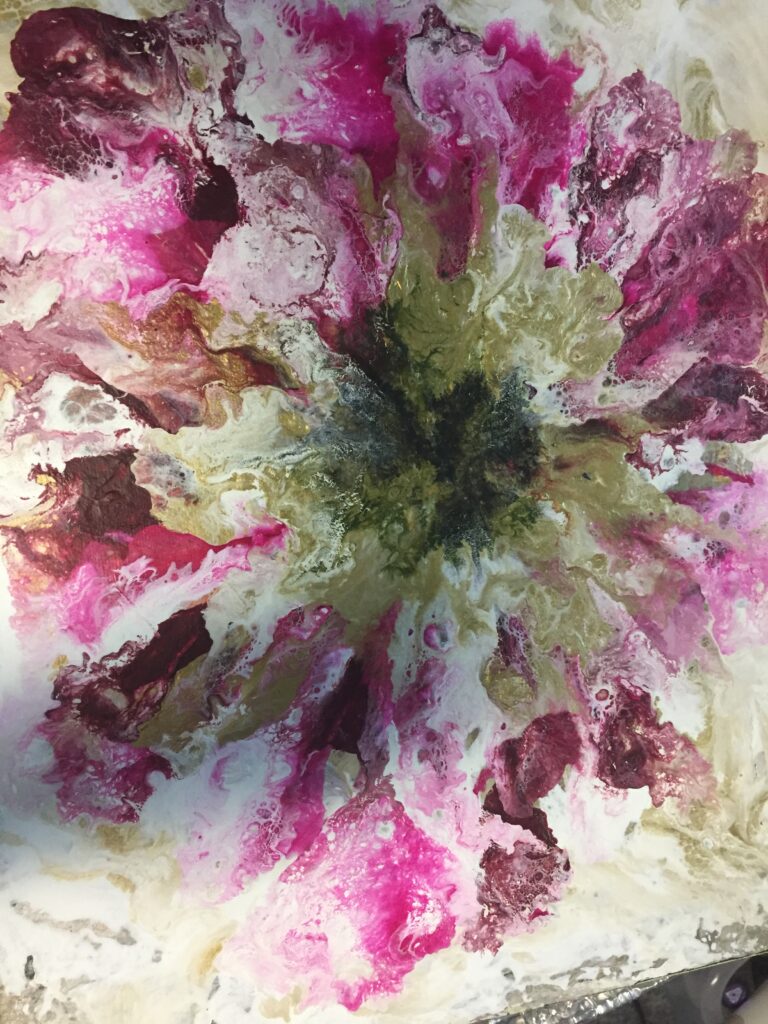
The first one of these and one that is good for beginning painters is the “Blow-Out”, using straws to move the thinned paint in the direction that you want it to go.

For this you will lay a base of either White or Black onto your canvas.  Into the base you will drop colors into it in the shape of flower petals.  Then take a straw and gently blow the paint from the center out and sometimes back again.

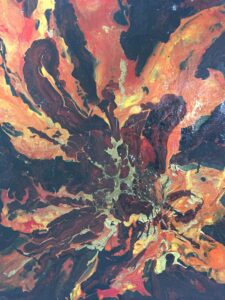
Colors I used for “Orange Blow-Out” are: Black, Dk Burgundy, bright Orange, cad Red Light, Cad Yellow Medium and quite a lot of metallic gold.  Blow & tilt your canvas until you get a design that is appealing.  Lay it flat (level) and allow to dry.

In trying to recreate this exact design,  I found less paint is better.  If the design doesn’t turn out as you had hoped, you can always use it as a background for other artwork (on top).

"Reverse Dip"

Reverse dipp in poured paint

Mark the size of the canvas onto waxed paper or freezer wrap (taped down).  This may be done on either White or Black (painted) canvas. Whatever color of your canvas, lay down a  layer of that color on the paper.

Place 3-4 harmonizing colors in flower shapes, add yellow & white dots in the center.  Add 2 shades of green for leaves.   Lay the canvas face side down onto the prepared paper.  Use a plastic card (like a credit card) & smooth all over the back of the canvas (lightly).  Lift straight up and see what happens.

The end result is always a surprise and whether or not it is a flower is up to your imagination.  Sometimes the designs and just that – attractive designs.

"Paper Towel Dips"

Use a white canvas, lay white  pouring paint onto the surface.  In a circle, start placing colors on one after another, stating with white, lighter colors outside and getting darker as it goes toward the center.  The colors I used were White, pink, hot pink, burgundy.  White & gold in center.  2 shades of green at outside corners  for leaves.

Spray a paper towel to get wet, place onto wet paint, lightly pressing with hands.  Starting with opposite corners, gather the towel up into your hand,  gather next corners until you have all corners in your hand.  Carefully, pull the entire towel straight up.  

Enjoy your creation.

"Final thoughts"

As I said there are countless You Tube channels with people creating poured acrylic paint pieces and almost as many different techniques.  My advice is, get some paints, watch a few videos and HAVE FUN!!