Texture Painting for Beginners

Texture Painting Lesson for Beginners

Beginner Texture Painting in acrylic

This simple and easy texture painting lesson for beginners, is a good project for new painters.  Texture painting, also referred to as “sculpture painting”, can be done on a variety of surfaces besides the canvas this project is on.  Almost any decorative surface like wood, plastic, metal, clay flower pots and even the walls of your home make a good base for this.

Tools & Materials:

In our class in Florida, we used spackle from Home Depot to create the raised poppies. The  limited palette of colors  used was, Titanium White, Magenta,Sap Green, Raw Sienna, Black, Dioxazine Purple & metallic Gold (my brand was Reeves and is a very golden metallic color).

Other supplies needed are a spray bottle of water, several  palette knives, 1″ flat brush,  liner brush, palette to hold paint (styrofoam plates work well), paper towels, water container, old terrycloth towel to absorb moisture.,

texture painting for beginners

Before The Texture Paste

Sketch your simple poppy design following the sketch below.  You can use colored chalk or charcoal pencil.  

Spray canvas with water & use the 1″ flat brush to cover the entire surface.  You should still be able to see a light outline of your design.  While it is still wet, drop some Raw Sienna + Black onto the canvas and allow to spread & run.  Control the amount of color by lightly spraying water as needed.  It shouldn’t be too wet.  Allow to dry for a few minutes.

What to know about Texture Paste (spackle)

Texture paste is available from all art manufacturers and you may decide to use one of these.  However, there is quite a difference in price when compared to Spackle from Home Depot or Lowes.  In my 15 years as a home decor artist & faux finisher, where I did numerous bathrooms, foyer walls, and other textural art, I opted for some version of spackle.

The spackle or texture paste comes in 16 & 32 oz. containers and I would suggest the smaller size, since it does dry out over time.  To keep it from drying too soon, there are a couple of things you can do.  1) transfer the paste from the plastic tub that it comes in, to a screw top container,  2) always clean the edge of the container when finished working and place a sheet of plastic wrap directly over the paste, before screwing on the top.

In addition, we need to get the paste to a malleable consistency for our sculpting.  Put 2-3 Tablespoons of  paste on a clean palette and work it with a palette knife back & forth, spritzing it with a bit of water to get it to a more workable paste.  Make sure to eliminate any lumps or other distracting materials.

texture painting for beginners

Applying the Texture Paste

Back flower petals

The most important thing to know when painting with texture is know the actual shape of the objects you will be painting.  A poppy has general cup shape with all petals anchored at the stem.

We will start with the back petals on each flower.  For each petal, load a rounded palette knife by  picking up the texture paste, touch it to the canvas , press and pull toward the stem.  Each petal must be pulled toward the stem.  

Front Flower Petals

There are 2 front petals on each flower.  For each front petal, load a palette knife on the left edge  with a medium amount of texture paste.  Start.  on the left edge of a front petal & pull across the flower.  Do the same on the right petal (loading the knife on the right edge).

Leaves

Using a more pointed palette knife, pick up texture paste & “paint” in shape of leaf , working from the center vein out toward the edges of the leaves.

Dry all paste just  a little with a hair dryer.

Begin the Painting Process (background)

The beauty of this type of painting,”Texture painting lesson for Beginner painters”, is that the water helps you achieve subtle shading and adding the gold at the end, adds beautiful highlights, pretty much without trying.

This painting process is done with very wet (watery) paint, so you need to have an old terry cloth towel under your canvas to absorb the excess moisture.

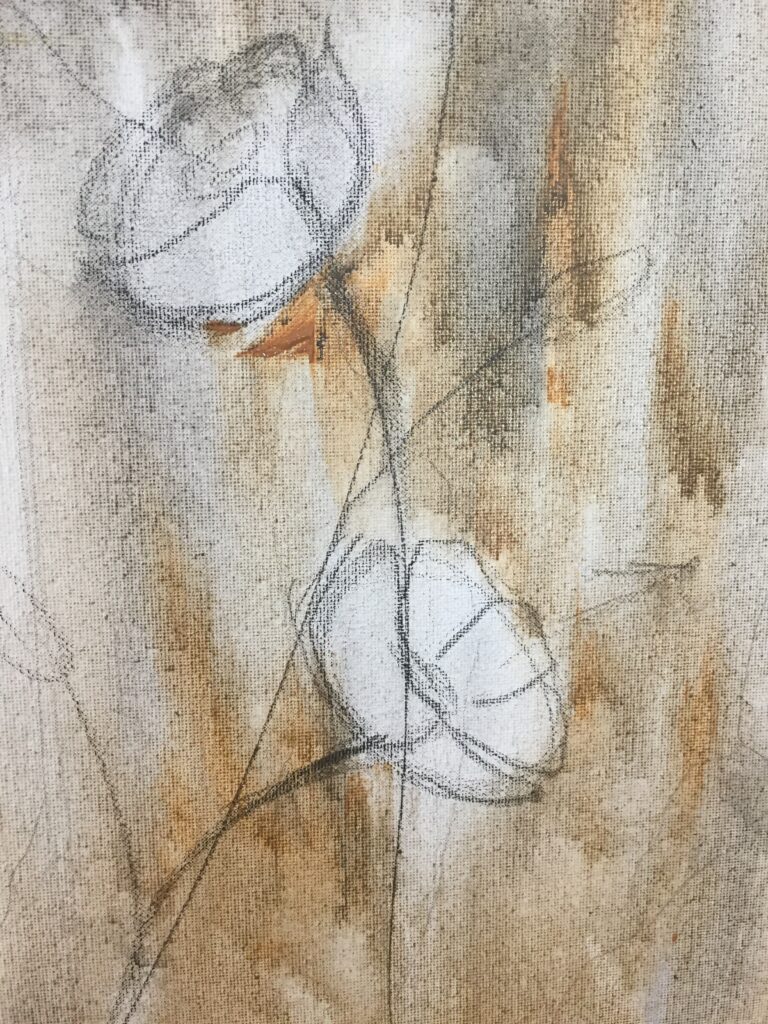
Lightly spritz the canvas all over with water.

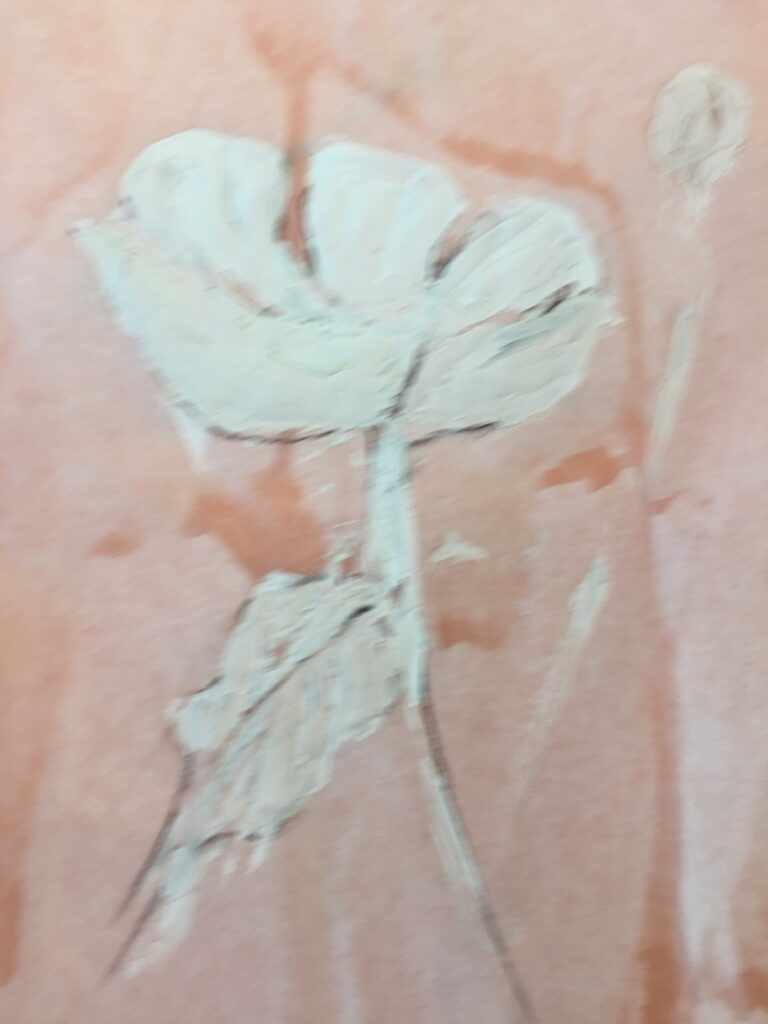
Place a small amount of black inside the flowers (behind the front petals) for shading.

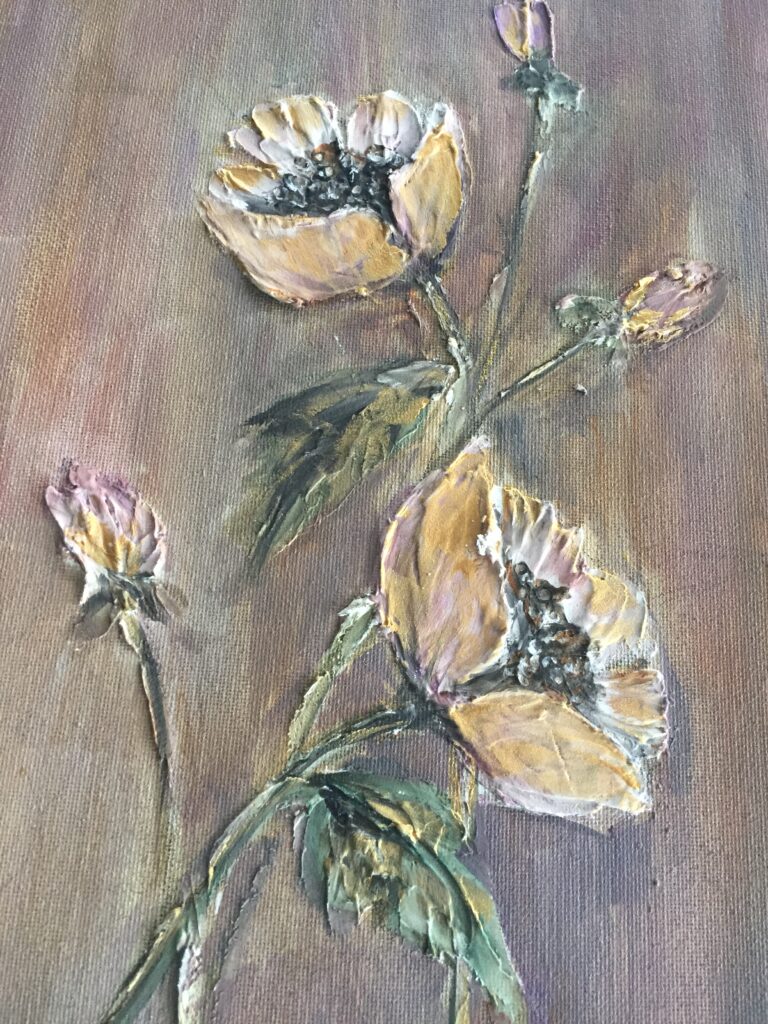
Take some Raw Sienna, Magenta & a little black  and begin to drop the colors behind the flowers to achieve a darkened background.  Stand the canvas up and allow the colors to run a little.  Keep adding little amounts of water and more color until you like the effect.  While this is still wet, add a bit of white, if desired, to lighten here and there. Wee want the left side of the canvas to be lighter than the right side.

Texture painting for beginners

Paint the Flowers and the Leaves

The back Petals:  Pick up Magenta, D.  Purple  + a touch of Raw Sienna + a tiny touch of Black and paint the back petals, upside down & from the base of each. Allow these wet colors to flow into the petals, letting some of the white of the texture paint mix with them and show through. the Purple can be adjusted, more or less, to control the darkness desired.  Pick up some Black on the corner of your brush & touch it to the base of each petal for shading.

The front petals are  painted with the same colors.  It’s ok if some of the white texture paste shows through. Touch a bit of the D. Purple + Black to the lower edges of these petals for shading.

Leaves are painted with a watery mixture of Yellow Ochre + tch Black+tch of Sap Green.  

Flower Centers:  Centers are Black with Black & white dots for pollen.  Use a brush handle dipped in paint and dotted on, black first & then white.

Stems:  Black, then bits of white & gold

Highlights

Using the metallic gold, go back to all the flowers & leaves & add in a dry brush manner (load the brush & just let it hit the high spots on the texture paste.  Add as much or as little as you wish.

Then, still using the dry brush technique, lightly drag some of the gold onto the background.  This must be done with a VERY light touch and with the brush almost flat to the surface.

This texture painting lesson for beginner painters is a project that could be painted on wood, metal,  clay pots or even a bathroom or foyer wall.  Have fun!!

Rita